Barcodes often need to be added in the label. CorelDraw provides BARCODE WIZARD tool to generate the barcode. As shown in Figure 3, it can be directly issued without problems.
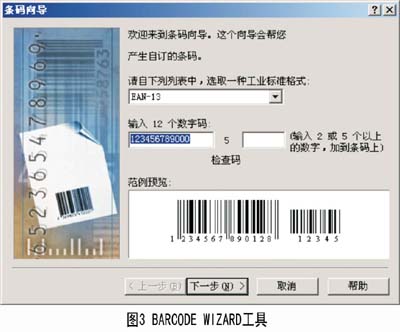
In practice, we often need to change the bar code's proportions, fonts, colors, and other properties. We use the following methods: Export the bar code to WMF format file, and then re-import, dissolve the group, and then edit. It should be noted that the bar code of the imported RGB mode should be changed to single black and then issued.
Design draft check
After the label design is finalized, do not make it immediately. Check all the attributes of the file information thoroughly to ensure that the design draft does not contain any objects and special effects that are not suitable for publishing, as shown in Figure 4.
Checks include whether system text is used, whether there are RGB objects, whether there is a rotated PSD image, and so on. In addition, special effects such as transparency, shadow, etc. in CorelDraw can sometimes cause problems during publishing. The solution is to convert all of the special effects in the design draft into high-line CMYK dot-matrix diagrams. Do not select the transparent background option when generating the bitmap, as shown in Figure 5.
Otherwise the original transparency will be lost. If the design draft contains colored thin lines or colored small text, it is recommended that the resolution of the bitmap be more than 500dpi.
Be careful not to turn the black object into a bitmap too, because the black dot pattern objects will be overprinted, and will be exposed when printed.
Finally, be sure to carefully check that the label is consistent with the pre-processing, because the upper and lower stacking relationship of the object may change after the group or conversion bitmap.
Imposition of labels
After checking the labels, you can make a large version. You must know the large-format printers and die-cutting machines before the imposition. In general, the distance between the hand-cut version of the knife bar is 3mm, so the amount of bleeding on the label is 1.5mm per side.
If the label shape is irregular, in order to achieve efficient imposition, we have found a trick in practice: use the interactive outline tool to enlarge the label frame by a volume of 1.5mm, as shown in Figure 6.
Then the enlarged outer frame is separated into unfilled and non-framed objects. After the original object group is grouped in the frame mode, the outer frame can be attached to ensure that the finished product has a live spacing of 3 mm.
Source: Ke Yin Media - "Printing Technology - Packaging and Printing"


