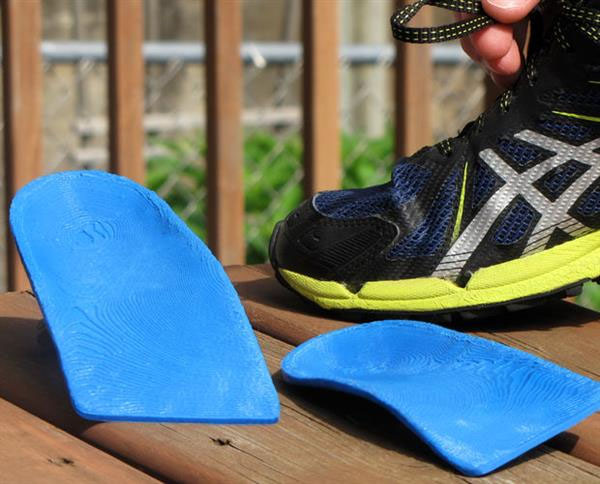
3D printing corrective insoles at home is no longer difficult
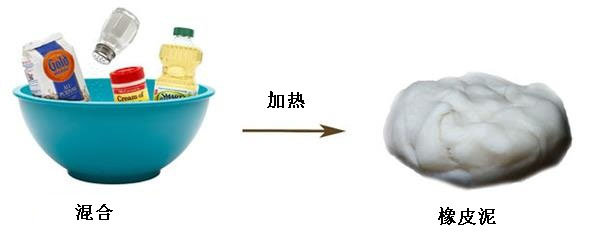
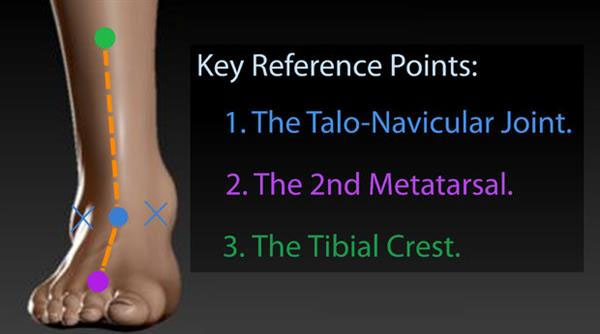
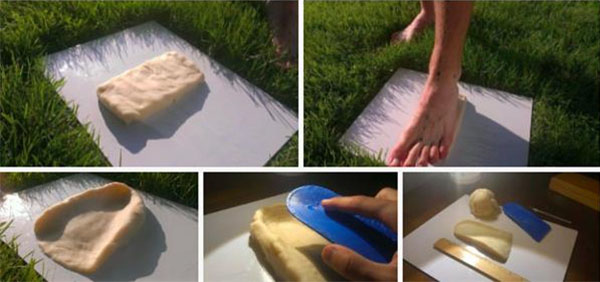
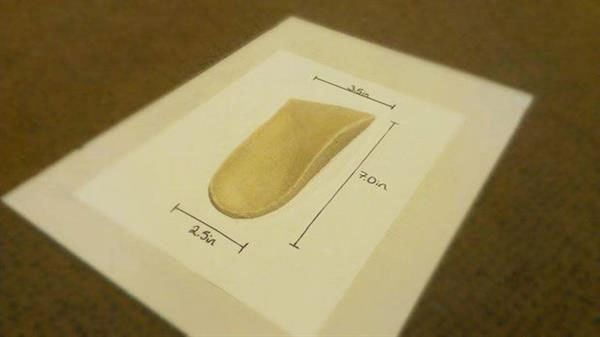
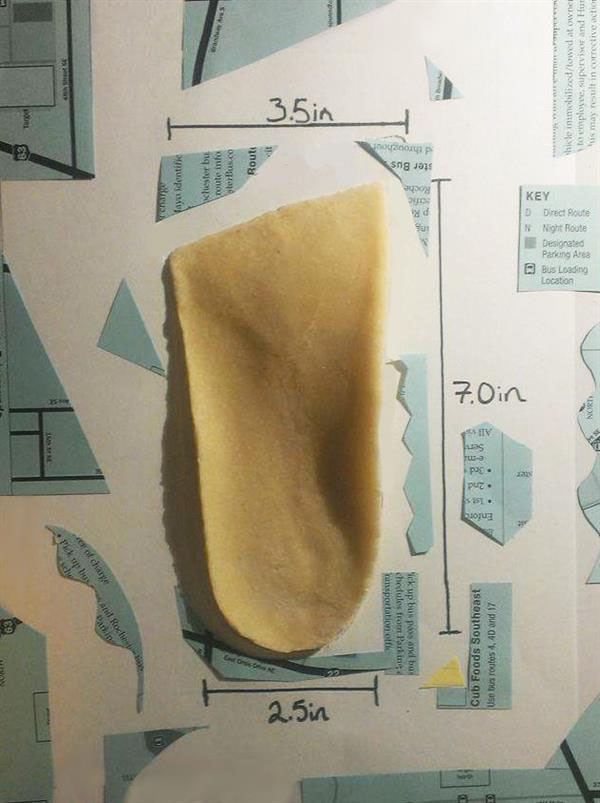
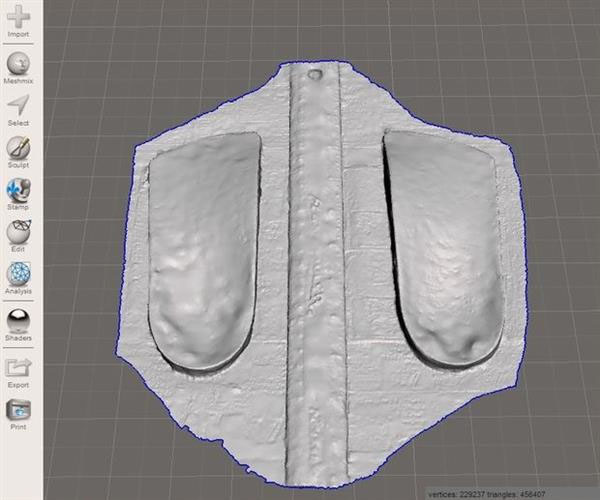
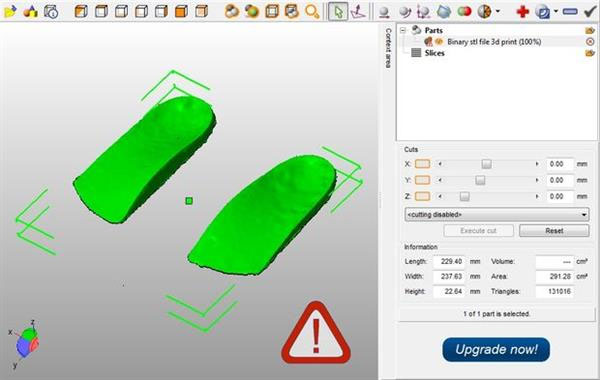
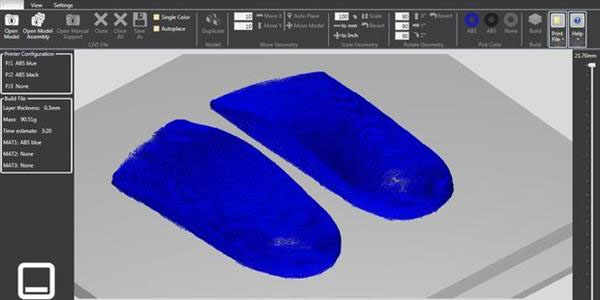
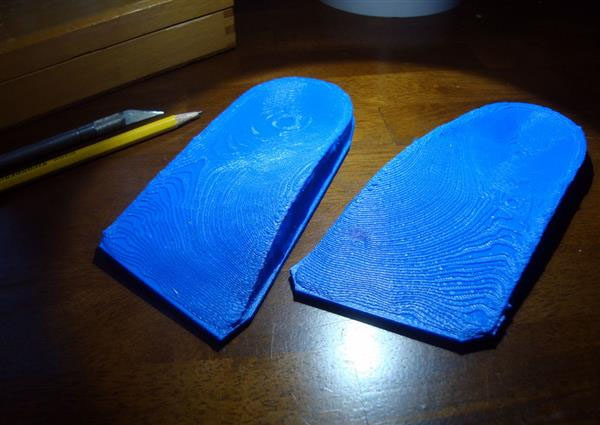
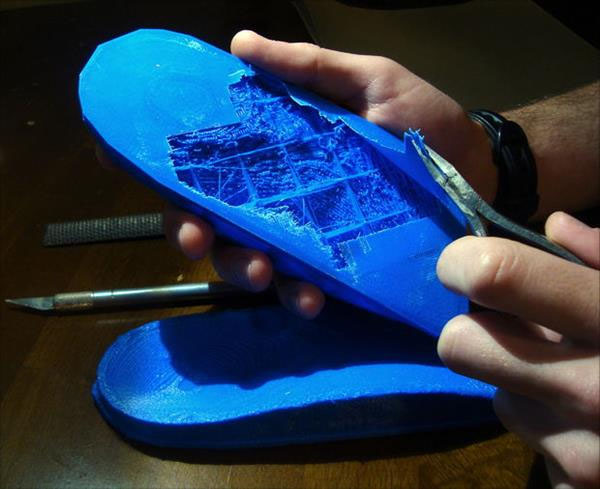
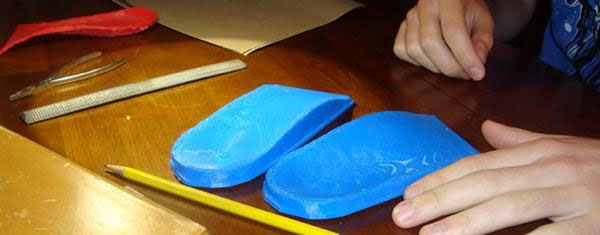
Foot pain is not a disease, it hurts to kill people. Adjusting the shoes to fit the curvature of the arch can prevent or even treat foot pain. However, these custom orthotic insoles are very expensive, typically up to $500. All this has become a thing of the past. Today, Instructables friend Matter921 and his friend Nate, the two majors majoring in physics and bioengineering, have created an easy-to-follow 3D printing custom orthosis tutorial, a little song, and the feet shake. Custom-made, corrective insoles require some simple consumables. First make a soft clay embossing - look for materials directly from the kitchen, such as flour, salt, cooking oil, tata powder, food coloring. You also need a smartphone, tablet or camera, install free 3D modeling software (eg, 123D Catch, Meshmixer, netfabb basic), plus a 3D printer. In the first step, the sole mold is embossed with soft clay. The molded clay can be replaced by flour, salt, cream or tata powder. Mix the ingredients in a pan and pour in oil and colored water until the mixture becomes homogeneous. After mixing, the pan is heated at low temperature and stirred until clay is formed (about 3 to 5 minutes). Turn off the heat, remove the pot, and cool the clay. Be sure to store it in a sealed container before use. Of course, you can completely ignore this step and buy clay or plasticine directly! It is not easy to get the right foot model. Fortunately, Matter921 uses an almost foolproof method - ICB. First, mark the "key reference point" of the foot, including the talus, the second metatarsal head, and the humeral ridge. Then, carefully draw the line between the three points. If the points are aligned, the line is straight, indicating that the foot is in the correct posture. Then, with the help of a friend, step on the clay and let them step on the heel. Follow the heel and press the small toe base down one by one until the big toe base joint (the first metatarsal) is stepped on. Then, pull the foot out of the soil to make sure the shape is correct and change the other foot. Matter921 said that it may take several trials to get the correct footprint. The second step is to start 3D modeling. To simplify the modeling process, remove excess clay from around the mold, gently place a flat-on shoe on top of the mold and carefully cut. Then, use the 123D Catch (installed on your tablet or smartphone) to take a photo of the mold (the software will guide you to adjust the angle and direction of the shot). Be sure to take a lot of photos from multiple angles! Refactoring software can stitch these photos together to create a 3D model. After completing the 3D model, import the .STL file into MeshMixer, adjust the settings, and prepare for printing. The adjustment tools used include model orientation and scaling. When oriented, make sure the top of the model (white) is visible and can be rotated along the baseline. In order to fit the size of the foot, the ratio is crucial. To do this, pay attention to the scale on the screen to make sure the scale is appropriate. Material that exceeds the height of the scale can be removed first. Next, make sure the z-axis is at the same height as the scale. After that, you can remove all excess material around the digital insole. Before printing, export the binary .STL file from Meshmixer, import netfabb reinforcement and fix the model. Then use the slice software that comes with the 3D printer to open it. In order for you to print successfully at a time, Matter921 and Nate experimented with various print settings. They recommend ABS, although PLA and other materials can also be printed. The print settings are as follows: Floor height: 300mm Filling gap: 20mm Shell: 2 Number of floors: 2 Number of top floors: 14 3D printing time is up! The two makers said they spent 75 hours printing 75 grams of filament consumables. After printing is complete, just a few steps to clean up. Visible from the print settings, the bottom layer is thin and the fill rate is not high, so it is easy to clean up excess material. Use pliers to poke the bottom layer and remove excess material from the interior until a clean top layer is left. Both sides of the model must be cleaned with pliers or with a knife. Finally, the corrective insole has a thickness of 3 mm and the toe and heel can be flattened. With a little flattening, you can put on your homemade orthopedic insole. Don't be too comfortable! Article source: 3ders, MagicFirm (Editor)
Smart sensor trash bin will help you to enjoy the quality and convenient life very easily. You could easily feel the convenience that intelligent technology brings to us. You could easily control the trash bin's opening by wave your hands upon the sensor screen 15-25cm and it will soft close automatically after 5 seconds count down. Or you could easily openthe lid by your foot to kick the bin body softly and also the lid will soft close after 5 seconds counting down. E-motion induction trash can will help you to rest your hands by its perfect infrared sensor and vibration sensor technology. What's more, this electric garbage can is also designed with lid stay open function that if you have to throw the rubbish for a while, you could press the "open" button on the screen to make the lid keep open and it won't close until you press the "close". (Or it will close automatically after five minutes.) So this sensor trash bin will help you throw the trash much cleaner, more effectively and more convenient.

Smart Sensor Trash Bin, E-motion Induction Trash Can, Electric Garbage Can, Automatical Intelligent Compost Bin
ZHEJIANG ERHUI TECHNOLOGY CO.,LTD , https://www.jahhome.com