Skiing class: Introduction to snowboarding technology Complete Raiders [Photos]
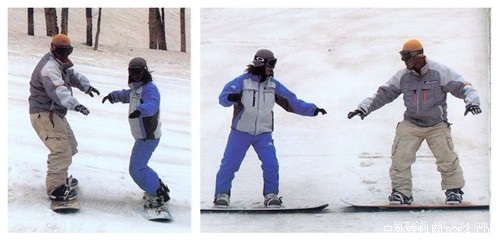
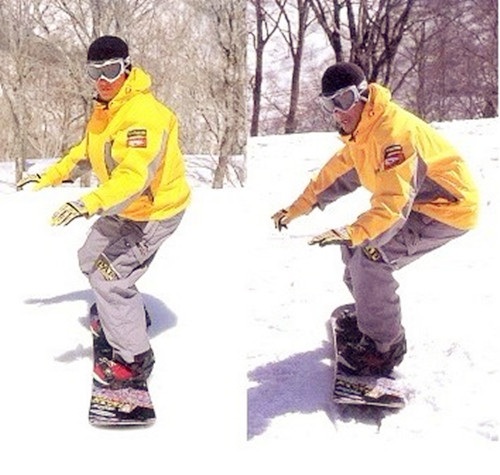
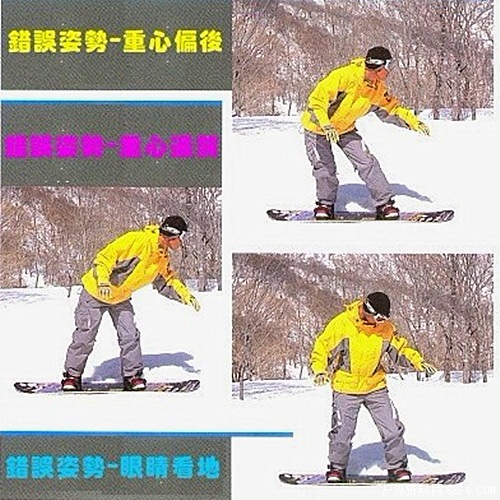
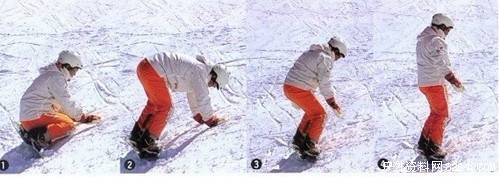
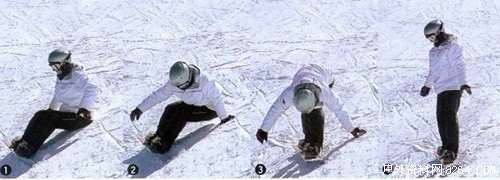
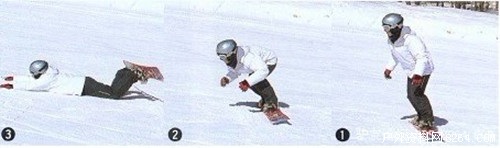
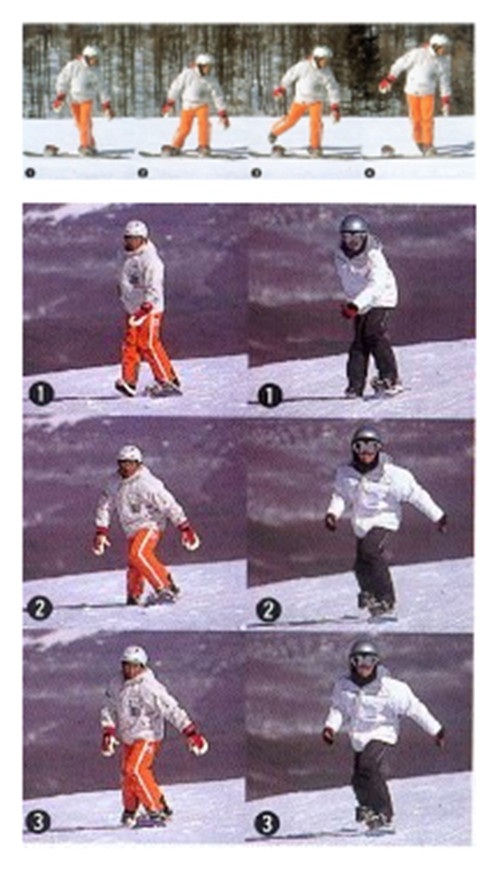
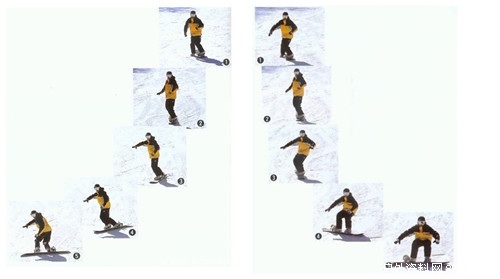
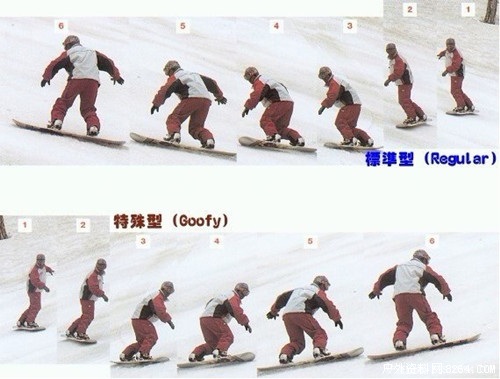
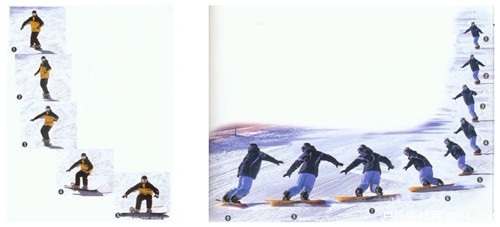
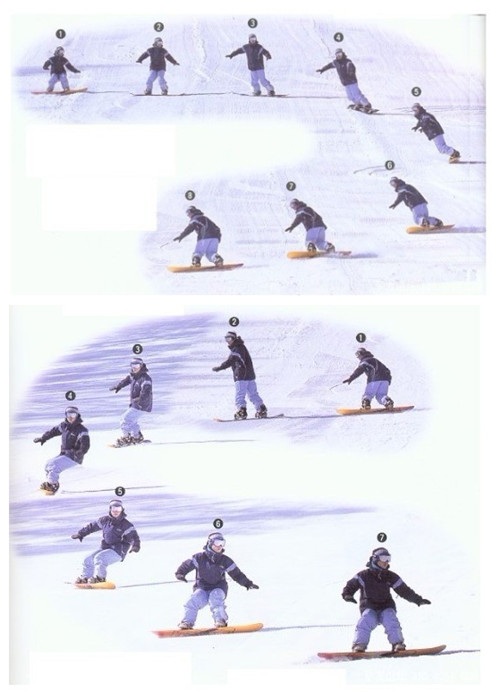
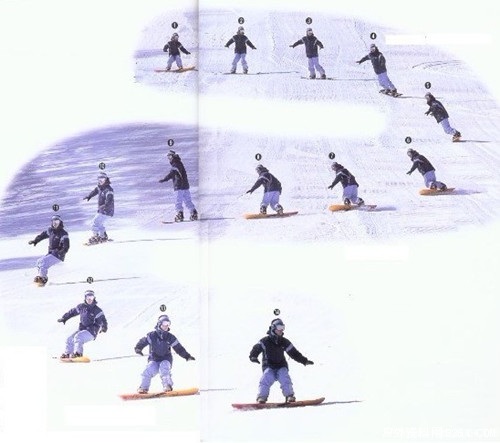
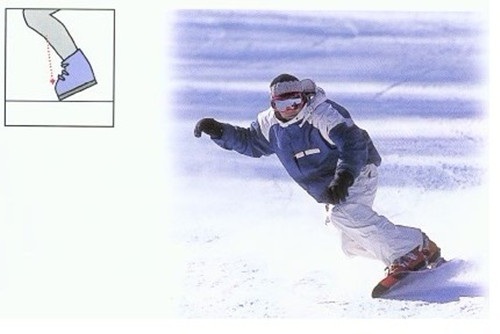
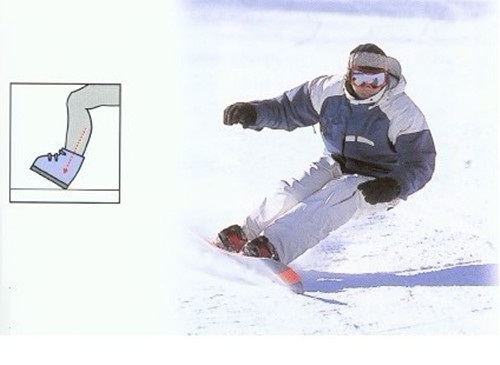
Heelside standing method 1. On the heel side steel side and hip top floor. 2. Support with your hands and start with the lower body. 3 hands to stand completely. Toeside safety wrestling 1 1. Knees land first. 2. Then place your palm on your chest. 3. Gradually disperse the power of the impact according to the knee and the palm of your hand. Toeside safety wrestling 2 1. Knees land first. 2. Then hold your elbows and palms in order. 3. Gradually disperse the power of the impact according to the knees, elbows, and palms. Snowboarding Tutorial 5 - Cross-Slide + Stop Heelside 1. When the feet of the two feet are tilted, the heel slides downward for the force point, and when the two feet are following, the output is adjusted so that the speed of the snowboard will not be eased and smooth. 2. Used micro-open auxiliary balance, the body is also slightly bent to maintain flexibility to maintain maximum stability. 3. When you stop, lower the body, knees, and pressurize the heel gradually to slow the speed of the snowboard and stop the brakes. 4. Remember that eyes must look forward, do not look at the ground! Toeside 1. The body slightly turns to the valley, and the eyes look at the rear. 2. Apply force to the front of the two feet (toes) and adjust the force so that the snowboard will not slow down and smooth. 3. Second-hand micro-open auxiliary balance, the body also maintain flexibility in the micro-bend to maintain maximum stability. 4. When you stop, lower your body and knees. Apply pressure to the front of the soles of your feet to slow the speed of the snowboard and stop the brakes. Snowboard Getting Started Tutorial 6 - Driftiness The zig-zag is the most important part of the skateboarding exercise. It takes some time to float on the leaves and it definitely has its value! Heelside 1. The heel exerts force, and the body tends to slide slightly. Slide left and tilt left; slide right and tilt right. 2. The finger points in the direction of the assistant. 3. Eyes look in the direction of the slide. 4. Before changing the sliding direction, let the body position return to the center point, and then apply the force on both feet. After the skateboard power is balanced, change the next taxi direction. Toeside 1. Action essentials with heelside, apply force to the toes. 2. Be careful not to look under your eyes! Advanced exercises The extent of falling leaves can be gradually adjusted with the proficiency of the exercises. The ultimate goal is to be able to slide as much as you like. Dropping leaves is an important practice exercise. It can also be applied to different terrains. It is a very useful life-saving move. During practice, if you have a heel or toe overstretched to cause discomfort, you can try toeside and heelside alternate interaction exercises to reduce discomfort. All exercises after the floats have begun to pay attention to the position of the front and rear feet. If it is a regular type, then the left foot is the front foot and all the exercises are with the left foot first. If it is a special type (Goofy), that is, the right foot is the front foot, and all the exercises are with the right foot first. Heelside 1. The heel is hard, the skateboard slides horizontally, and the essentials of movement are the leaves of the same valley. 2. Strengthen the heel force of the back heel to make the skateboard back up the hill. Toeside 1. The toe end is forced, the skateboard slides laterally, and the essentials of action are the leaves of the same mountain. 2. Strengthen the toes on the rear foot to make the skateboard back uphill. This exercise can also be combined with the prosperous aspect. The larger the angle of horizontal slide, the faster the speed of the skateboard will be. Snowboard Getting Started Tutorial 6 - Driftiness The zig-zag is the most important part of the skateboarding exercise. It takes some time to float on the leaves and it definitely has its value! Heelside 1. The heel exerts force, and the body tends to slide slightly. Slide left and tilt left; slide right and tilt right. 2. The finger points in the direction of the assistant. 3. Eyes look in the direction of the slide. 4. Before changing the sliding direction, let the body position return to the center point, and then apply the force on both feet. After the skateboard power is balanced, change the next taxi direction. Toeside 1. Action essentials with heelside, apply force to the toes. 2. Be careful not to look under your eyes! Advanced exercises The extent of falling leaves can be gradually adjusted with the proficiency of the exercises. The ultimate goal is to be able to slide as much as you like. Dropping leaves is an important practice exercise. It can also be applied to different terrains. It is a very useful life-saving move. During practice, if you have a heel or toe overstretched to cause discomfort, you can try toeside and heelside alternate interaction exercises to reduce discomfort. All exercises after the floats have begun to pay attention to the position of the front and rear feet. If it is a regular type, then the left foot is the front foot and all the exercises are with the left foot first. If it is a special type (Goofy), that is, the right foot is the front foot, and all the exercises are with the right foot first. Heelside 1. The heel is hard, the skateboard slides horizontally, and the essentials of movement are the leaves of the same valley. 2. Strengthen the heel force of the back heel to make the skateboard back up the hill. Toeside 1. The toe end is forced, the skateboard slides laterally, and the essentials of action are the leaves of the same mountain. 2. Strengthen the toes on the rear foot to make the skateboard back uphill. This exercise can also be combined with the prosperous aspect. The larger the angle of horizontal slide, the faster the speed of the skateboard will be. Snowboarding Getting Started Tutorial 8 - Sliding back to the mountains Heelside 1. The skateboard slides straight down to the valley. 2. The heel of the back heel is pressed step by step and the skateboard is turned back to the mountain. 3. This exercise can be used in conjunction with a horizontal slide down hill practice project, which can be considered as the final exercise goal. Toeside 1. The skateboard slides straight down to the valley. 2. Repeatedly pressurize the toes of the rear foot to turn the skateboard back to the mountain. Snowboarding Getting Started Tutorial 9 - Sliding Down to Turn From the valley to the mountain Step 1: Going out of the valley valley. Step 2: Let go of the pressure on the skateboard and straighten your body and knees. The heel side that was originally in contact with the snow will also be laid flat. Step 3: Keep the body slightly forward and slide the skateboard straight down. Step 4: The steel edge of the toe touches the snow and is ready to turn. Step 5: Depress the center of gravity, bend the body and knee gradually, and pull back the toes of the back foot. Steps 6, 7, 8: With the curvature of the skateboard itself and the pressure on the toe side, the skateboard turns into a mountain. From the mountain to the valley 1. The essentials of action are the same as above. 2. When the corner turns, the heel of the hind foot comes forward. Eyes walking in the direction of taxiing, assisting in balance with both hands, and maintaining maximum flexibility in the body and knees are constants. Between shifting directions, it is an important procedural step to flatten the steel edge of the skateboard. If you miss this step, you may fall because of the steel edge action and the body movement. Toe side action: Heel side action: Charcoal Stove,Wood Fire Stove,Beach Fire Ring,Patio Grill JIANGMEN XINXIN METAL PRODUCTS CO., LTD. , https://www.xxbbqgrills.com